
I've seen so many great contemporary wreath's, but seriously, who spends $100 on a wreath each year?
After seeing some Pinterest links, I thought 'Yea I'm crafty, I can do this!'. You can too!
For more of a contemporary look, I decided to make a monogram letter wreath. Luckily our last name's first initial is C, also standing for Christ, Christmas and our son's first name :)...convenient, though any letter will look stylish on your front door.
Budget suggestion:
- {for NEXT year} Buy supplies after Christmas on sale. Those red berries can get expensive.
- Large wooden letters seem impossible to find (14-18"). Online, expect to pay at least $30 for a cut wooden letter. Instead, buy thick poster board from your craft store ($5) and draw your own letter. PLUS you can draw any font or create your own!
- Look for early season specials - Michael's had 40% off some supplies. Also check online for coupon's.
Monogram Christmas Wreath Tutorial:

{Supplies}
- Red berries (3-4 stems about $6 a stem). Style and size is up to you. I went with more natural small red and black berry stems. Amount needed also depends on your letter size and chosen letter.
- Burlap ribbon ($1.50) - gives a stylish country feel. Make sure your ribbon has some stiffness to it, to hold it's shape.
- 1/2"-3/4" thick poster board
- Red craft paint (I got it 'Tomato Red' on sale for $0.49) Try to get a red close to your berry color.
- Foam brush ($0.25)
- Glue gun ($2) and tubes of glue ($2)
- Scissors
- Box cutter or large Xacto knife
- Cutting Board
{Tutorial}

1. Draw out your letter onto the poster board. Don't worry about neat lines- you're painting the letter. I made mine about 18" in height. You'll need a sharp cutting tool and steady hand to cut out the shape. Put a cutting board underneath to ensure you don't carve your initials into your counter :).
{Note}: Don't make your letter TOO THIN! It makes it difficult to cut out and you need enough width to glue on the berries


2. Paint several coats of paint on both the top and sides of your letter. This way if there is any space between berry's, horrible white board won't show through.

3. Glue berries. Simple! I started with the clusters and then chopped off individual berries or small groupings to fill in the spaces. Variation in height is fine and adds a more natural look. I didn't bother to glue on the sides as I wanted to keep the letter edges crisp. Plus, you'll only really see the front of the wreath.
{Extra}: Try adding some of the berry leaves as well for a wreath variation.
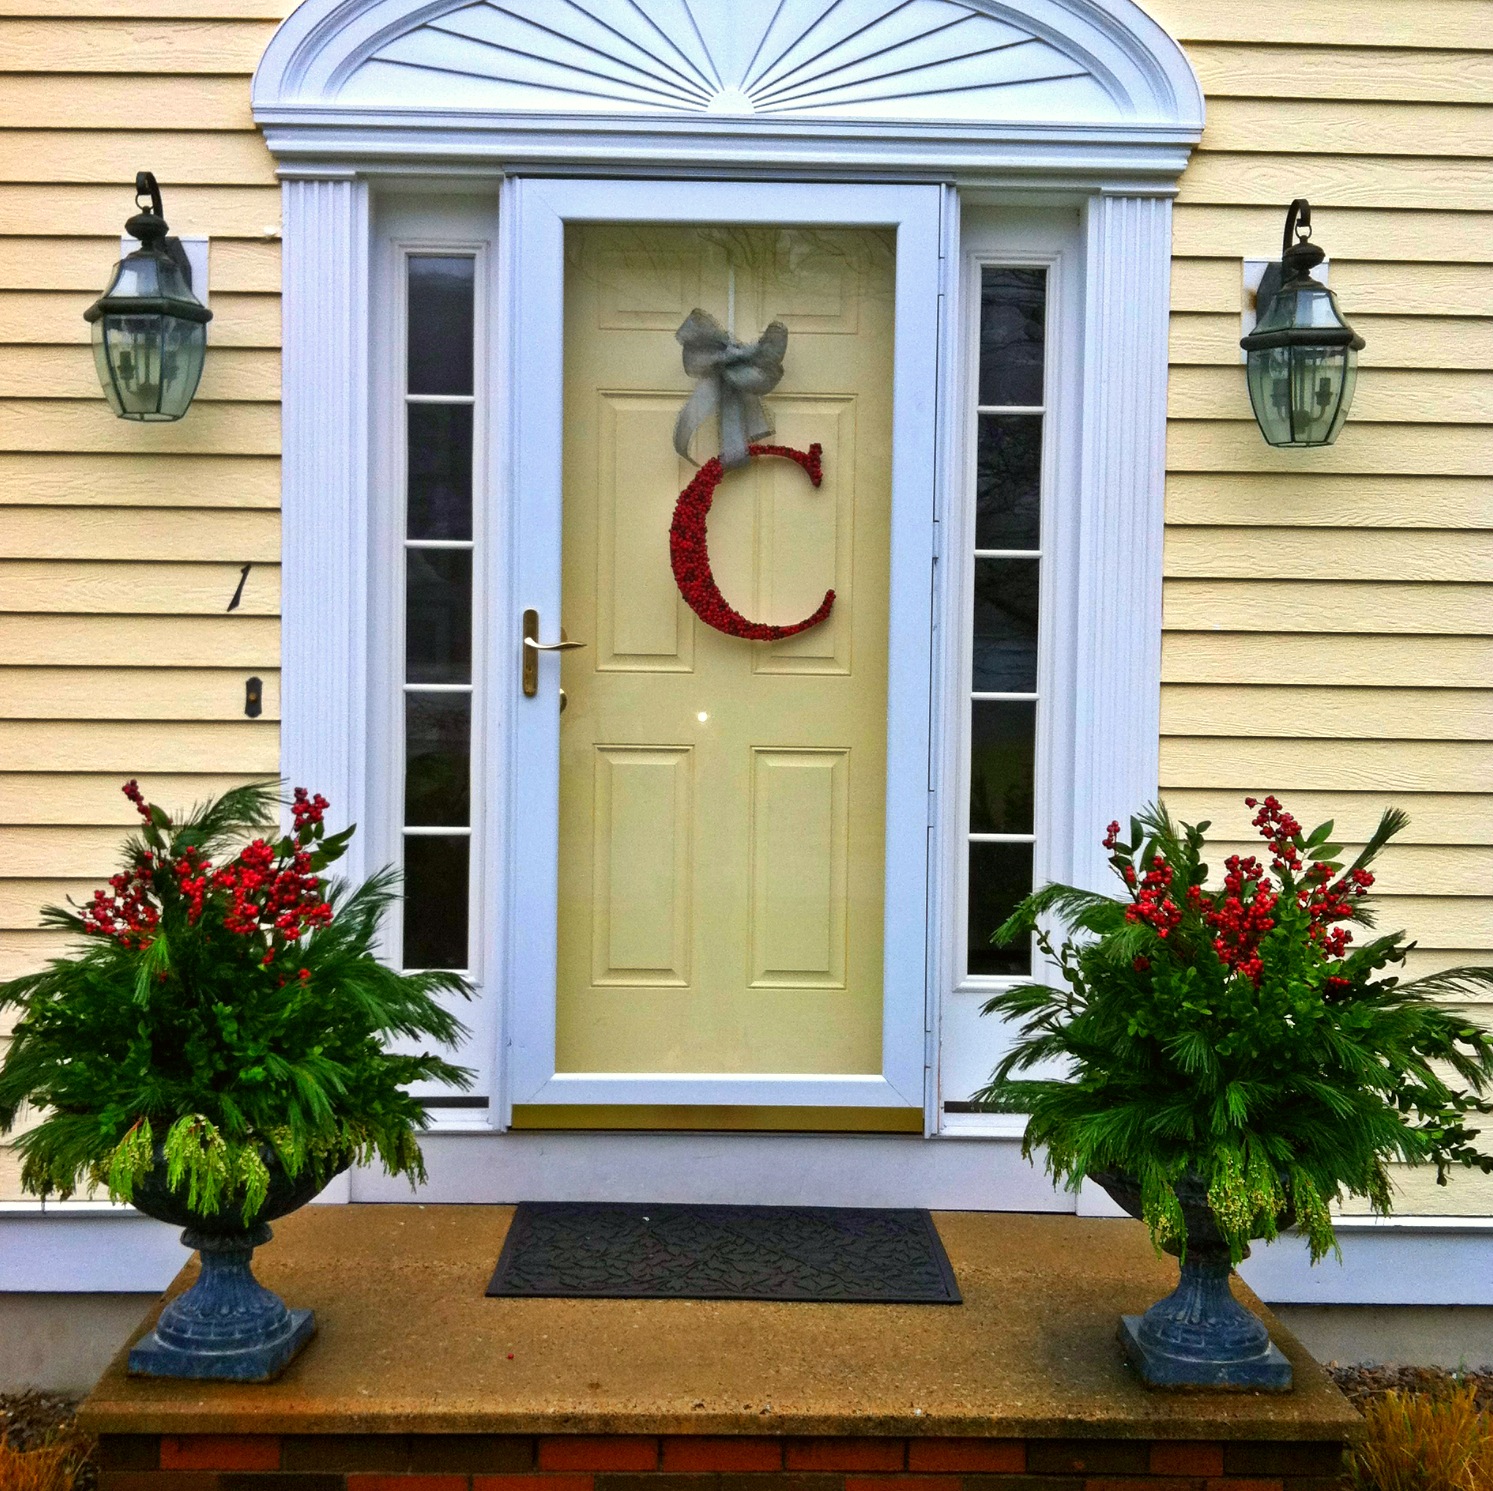
4. Add your burlap ribbon and tie with a single or double tiered bow. Placement of your bow will vary depending on what letter you use. Hang over your door. See how the simple wreath add cheer to the greenery and berries outside! :) Merry Christmas and happy decorating!
0 comments:
Post a Comment